IN ORDER TO START A BLOG YOU WILL
NEED TO WORK THROUGH THESE 4 SIMPLE STAGES:
1. Choose a blogging platform
2. Pick a Domain Name – Start Your Blog – Web Hosting
3. Install WordPress on your hosting account
4. Choosing Your WordPress Theme
In this tutorial we will be building a blog with WordPress.
STEP ONE
Choose Your Blogging Platform
A blogging platform is the software used to manage your blog. It allows you to create blog pages, add content, images, video and everything else that you would need to do when updating your blog. Another name for a blogging platform is a CMS ( Content Management System).
There are lots of different open source platforms which most web hosting companies will support when you are creating your blog. The main blogging platforms are:
- WordPress – is the most popular and customizable content management system (CMS) in the world
- Ghost – is a new blogging platform that is creating a lot of noise in the blogosphere
- Drupal – is quite popular but is difficult for novices
- Joomla – another fairly popular CMS but there is a very steep learning curve
- Blogger – a free blogging solution from Google
Why I Recommend WordPress For Starting A Blog
Well to begin with my website makeawebsitehub.com is built on WordPress, and over 25% of all websites and blogs on the internet use WordPress.
Over the past few years I have worked with all of the well known blogging platforms but always recommend WordPress to blogging novices due to the great community support and ease of use.
It’s INSANELY simple to set up.
You will see just how easy later in this How To Start A Blog guide. To give you some idea to how simple it is, my 9 year old daughter set up her own blog with ZERO help from her expert dad (that’s me by the way).
You will see just how easy later in this How To Start A Blog guide. To give you some idea to how simple it is, my 9 year old daughter set up her own blog with ZERO help from her expert dad (that’s me by the way).
So easy to use.Managing your blog, adding content, adding images, amending content and much much more can be done with absolute ease in WordPress. The platform has an extremely intuitive interface so adding new pages, blog posts, etc. can be done very quickly. Out of the box WordPress ticks most of the boxes you will need for your new blog and if it doesn’t there is probably a plugin out there for you.
Blogging is at the heart of WordPress.WordPress was designed and built for bloggers as a blogging platform so all the blogging capabilities and functionality are already built-in and waiting for you. If you want to set up an email subscriptions to your blog, then this can be added via a plugin in just seconds. That’s the great thing about WordPress, you can literally set your blog up and publish your first blog in a matter of minutes.
Total control.With WordPress, you have total control over your site. There’s no waiting for a web designer or developer to amend your content. You can just login to your dashboard and make changes yourself.
WordPress is secure.As long as you keep your WordPress platform and plugins updated with the latest versions, and you adhere to secure password best practices, then WordPress is a damn secure place to have your site. WordPress update their software all the time to make sure that it continues to be secure and keeping hackers at arms length.
Excellent support & vibrant communityThe WordPress community is vast, vibrant and always will to help out. Check out their support forums to see just how good it is.
Why You SHOULD NOT Start A Blog On A Free Platform
Plainly and simply I will never recommend someone who wants to start a blog to use a free platform such as Blogger. While there is zero barrier to entry and no up front financial cost to you, there are lots of concerns which could cost you more in the long run. If you can, then you should always self-host your blog.
When something is free, YOU are the productBecause of this fact a platform such as Blogger or WordPress.com can shut you down at any point, with no warning and no way to recover your content. A minor indiscretion such as using an image without the right consent can have your site deleted and no way to challenge it.
No CustomizationUsage of ALL the free plugins and features are very limited. And if you want to customize your free theme to make it stand out from the crowd, then just forget it. You can’t do this on WordPress.com (free version of WordPress)
It looks unprofessionalMany of the free blogging platforms do not let you have a custom domain which gives across an unprofessional appearance to potential customers and subscribers. You are also very limited with the level of customisation you can do to your blog so your site looks just like everyone else’s.
It’s hard to make money from your blog when you don’t own the domain or hosting.Most free blogging platforms will not allow you to place any adds or affiliate links on your site. So how can you make any money from the traffic that you have being working hard to build? Answer: No chance.
Many LimitationsThe free blogging platforms give you very little in terms of web space. You might get 5GB if you’re lucky. For today’s websites this is just not enough when you consider uploading images and videos to your blog posts.
So what should you gather from this guide so far?
Simple. Don’t go for creating a free blog, because it will restrict you at every stage.
If you think that starting your blog on a free platform now and moving to a paid solution later on is the best way forward, then think again! Migrating your free blog from a free blogging platform to a better paid option can be very difficult and time consuming.
What you should do when starting a blog
The best way forward is to build your blog on a platform like WordPress.org where you will own your website and content 100% because you are self-hosted and you have your own professional / personal domain name. You won’t have any limitations and you’re free to monetize your website, which is vital if you’re wanting to make money online from your blog.
Paying for web hosting for your blog is not very expensive and can cost as little as around $5 per month for very simple hosting packages. Having a reliable web host will mean that your site is backed up regularly and you have rights to recover your website for any reason.
STEP TWO
Picking A Domain Name For Your Blog & Setting Up Your Web Hosting
In order to set up a blog you will need a domain name and web hosting. If you are new to starting a blog then I recommend that you register your domain & hosting with the same company to keep things simple.
Domain Name: This is your website address i.e. the domain name for this website is makeawebsitehub.com. Try to choose something short and catchy for your blog that will be easily remembered. I recommend that you stick to .com domain names if at all possible as many of the new domain names aren’t as easy to recognize.
Web Hosting: This is where your blog is stored online. There are lots of different hosting companies out there which offer different types of hosting for a variety of different types of websites. The WordPress platform is free of charge but you will have to pay around $3-4 per month for your Web Hosting and Domain registration fees.
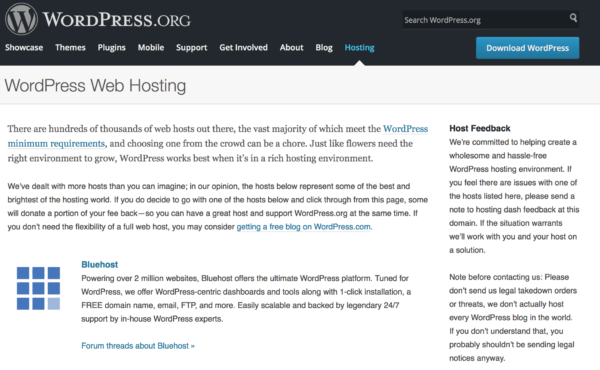
The Best Place To Buy Your Blog’s Domain And Hosting.
I personally use and can highly recommend using BlueHost.com to start a blog because of their simple installation process, great customer service & reliability. They’re also recommended by WordPress.org as a top host since 2005.
Affiliate disclaimer: I recommend Bluehost because I use them on a lot of websites that I own or have built for clients. I also truly believe they offer a superior service to other hosting companies. All Bluehost links on this page are affiliate links which means that I will get commission if you buy hosting with Bluehost via one of my links. This helps me to run makeawebsitehub.com and keep all the guides on this site free to use and share.
Over the years, I’ve tried dozens of different WordPress Hosting providers, so I suppose you can call me an “expert” at choosing the worst best hosting for my blogs. If you want to learn more about what is on offer then read my web hosting reviews.
Once you have decided on which web hosting company to work with you will need to install WordPress on your account. I have created a guide on how to install WordPress on a variety of different web hosts.
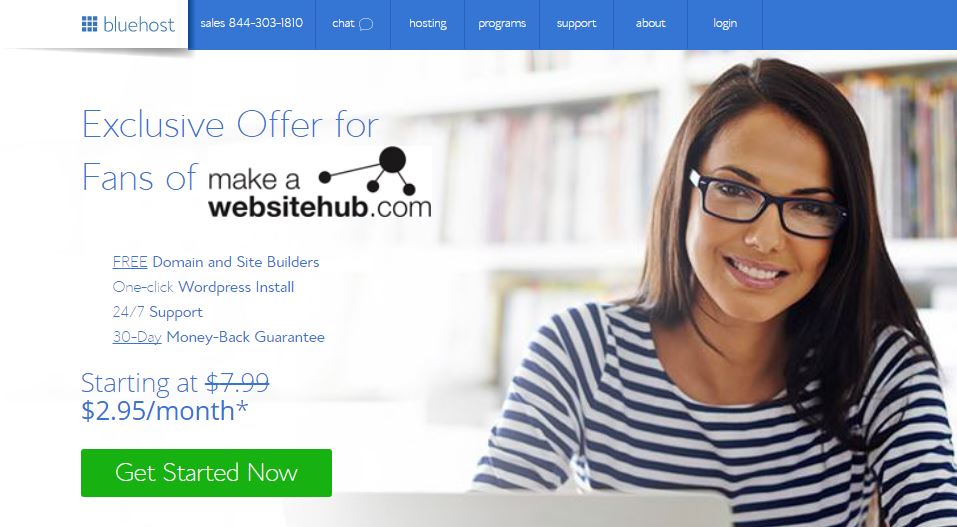
Additionally if you sign up to BlueHost today, you will get high quality hosting from just $2.95 per month, as well as a FREE domain name worth up to $15 for your new blog too!!! Use this link to get a free domain with your hosting.
Remember: If you’re unhappy with your BlueHost purchase within 30 days, they will give you your money back.
When you sign up for hosting with BlueHost there are some additional services they offer. Domain Privacy Protection means that people won’t be able to see the name, address and contact details of who owns the blog, if you’re happy for people to know who owns the blog then you can deselect this and save yourself about $12 per year.
Starting A WordPress Blog On BlueHost
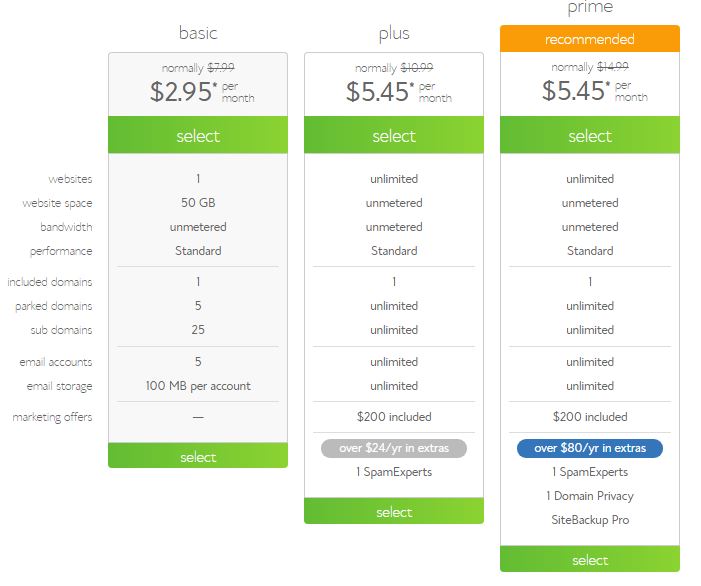
For a limited time only you can get basic hosting from Bluehost for a crazy cheap price of just $2.95 per month (36 months sign up + free domain name).
For new bloggers looking to grow their sites, I recommend going for the Bluehost Plus plan for $5.45 per month, as you get a lot more unlimited features. This is ideal if you plan to scale up your blog in the future or host more than one website.
Normally the Plus Plan hosting package would cost you $10.99 p/m, so jump of this deal now while it’s still available.
Remember that you can always start off with the basic plan and upgrade whenever you feel you need more features.
Here’s What You Get For $5.45 Per Month With The BlueHost Plus Plan:
- A FREE domain name ( worth $15 )
- Fast, high quality & reliable web hosting
- Free Site Builder
- One-click WordPress Install and 24/7 support.
- Unmetered website space
- Unmetered bandwidth
- Unlimited email accounts
- Unmetered email storage
- Host unlimited numbers of websites on your account
Click on the “Get Started Now” button to start the process of creating your very own blog.
2. Next you’ll need to select the right plan for you and your blog. I recommend either the Plus or Prime packages. You can start off with basic if you like and upgrade anytime you feel you need more features to run your website.
3. Once you’ve selected your plan you’ll then see this page…
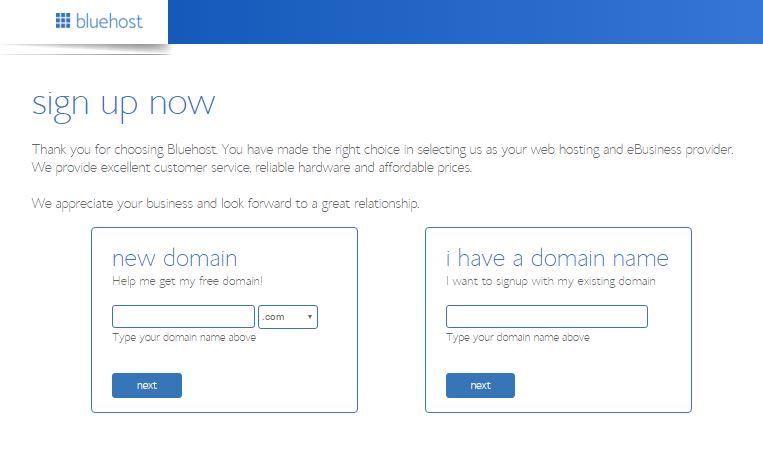
If you already have a domain name, from another domain name provider, that you want to use; then just enter it in the right hand box and then click next to assign your domain name to your new hosting.
Let’s say you don’t have a domain name and you want to claim your free domain.
Type in the domain name that you’d like in the left hand box where it says “New Domain” and then click next. If it’s available then you’ll be able to proceed.
If it’s already registered then BlueHost will cleverly show you some similar domain names that you might want to consider. Or you can just type out another domain name idea to see if it’s available.
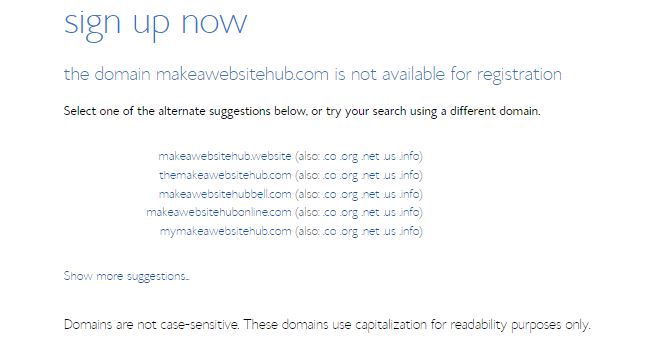
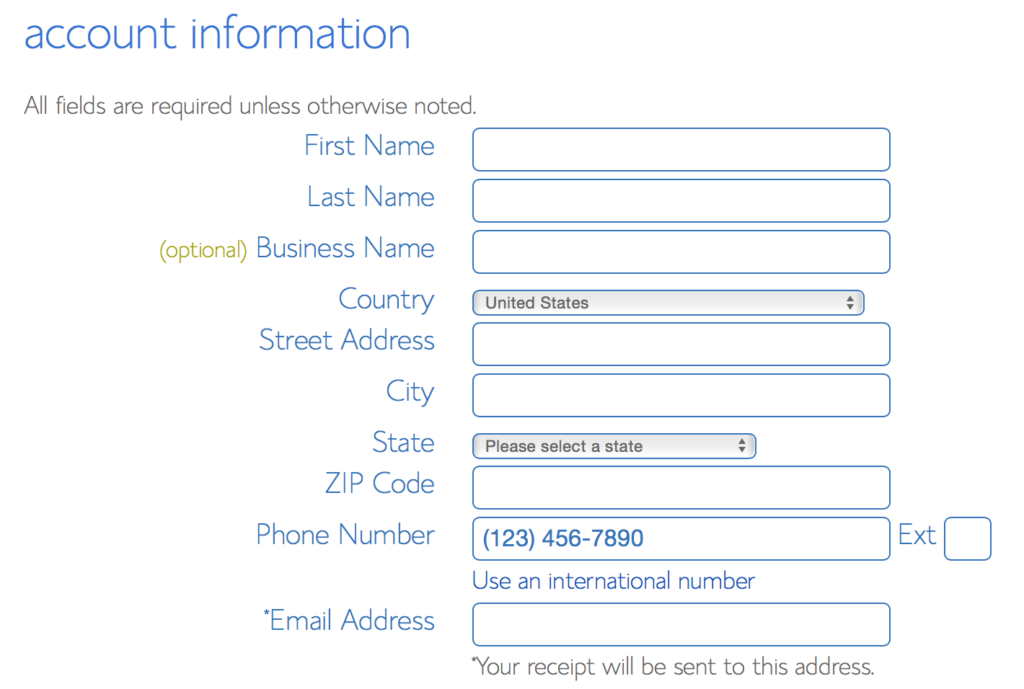
4. So you have found the domain name of your dreams and you’re now ready to set it up with your new hosting. The next screen you’ll see is the domain registration page where you will have to put in all the boring details such as account information, but this takes no time at all.
5. Once you’ve filled out the domain registration form, its then time to select your hosting plan. You’ll find this section directly below the account information section.
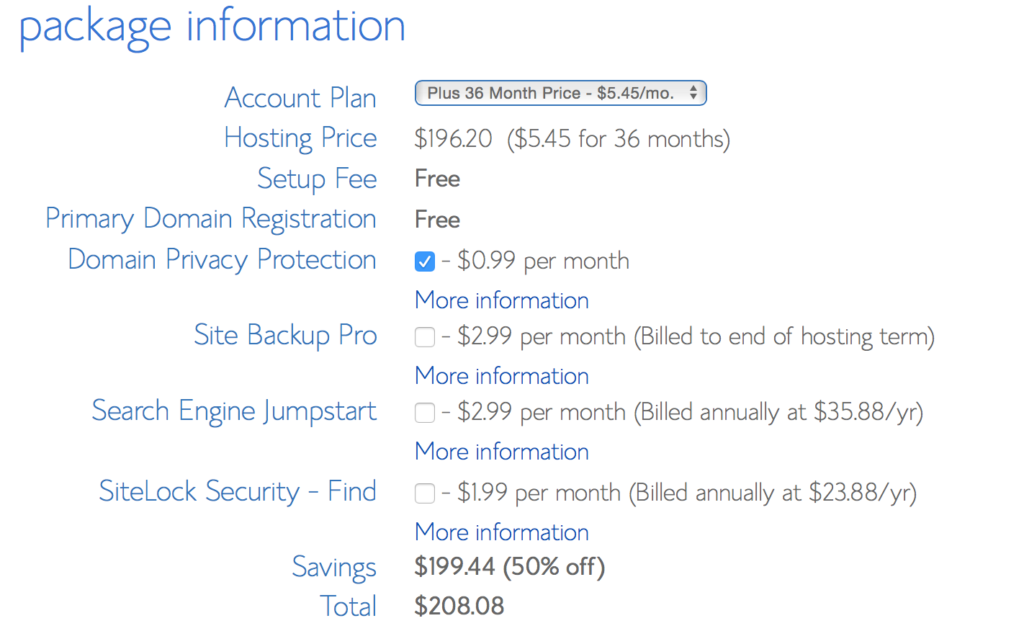
I normally suggest you select the Plus or Prime plan at 36 months to get a better deal on the hosting, but 12 or 24 months is fine also.
I normally don’t click any of the other options as they’re not essential however I do recommend getting domain privacy if you don’t want anyone knowing who owns the domain. The great thing about the Prime package is this option is free.
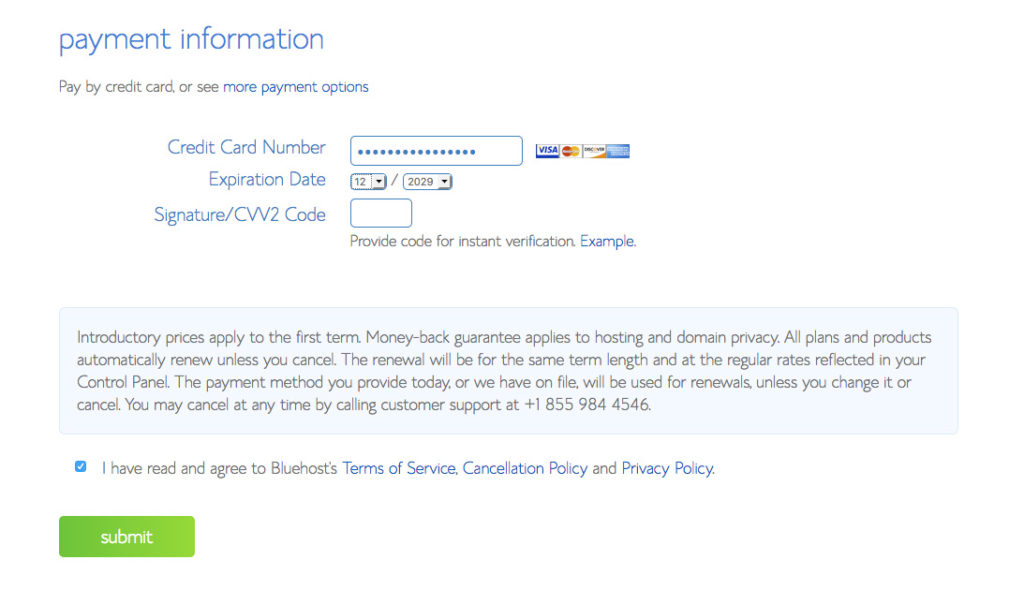
Then scroll down and fill out the billing information, click submit and you are done!
6. You should then receive an email from BlueHost with all your account and login details. Check your spam folder as it can sometimes end up in there if your email client is a little too sensitive.
Keep your login and welcome information safe as you may need it for future reference.
7. The next thing you’ll need to do is to create a password for your WordPress dashboard login. This is the page you’ll see next after paying for your hosting package. Simply click on the green button to create your password.
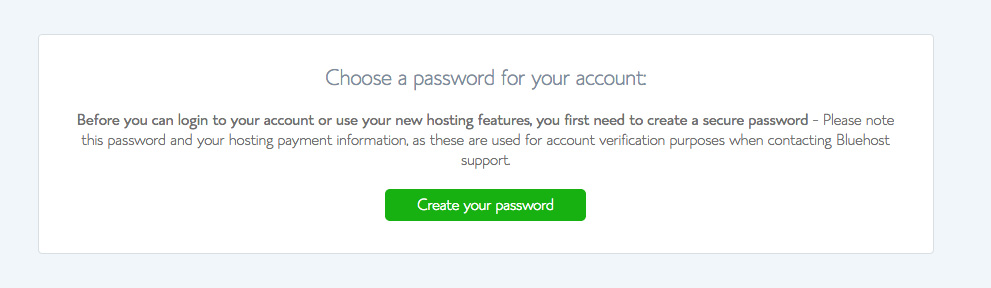
On the next screen, you’ll need to put in your desired password into both fields. My advice to you would be to make the password over 15 characters with a mix of numbers, upper and lower case letters and a few special characters such as $%*(*£!.
Make it hard as possible for those hackers wanting to get into your blog. Once you have a long and complex password, make note of it and click next to move onto the next stage.
STEP THREE
Installing WordPress On Your Hosting
So you’ve signed up and paid for your BlueHost hosting. Great! You are nearly there.
The next thing you need to do is to login to your BlueHost account with the details they sent you in the welcome email.
Here’s what the login page looks like.
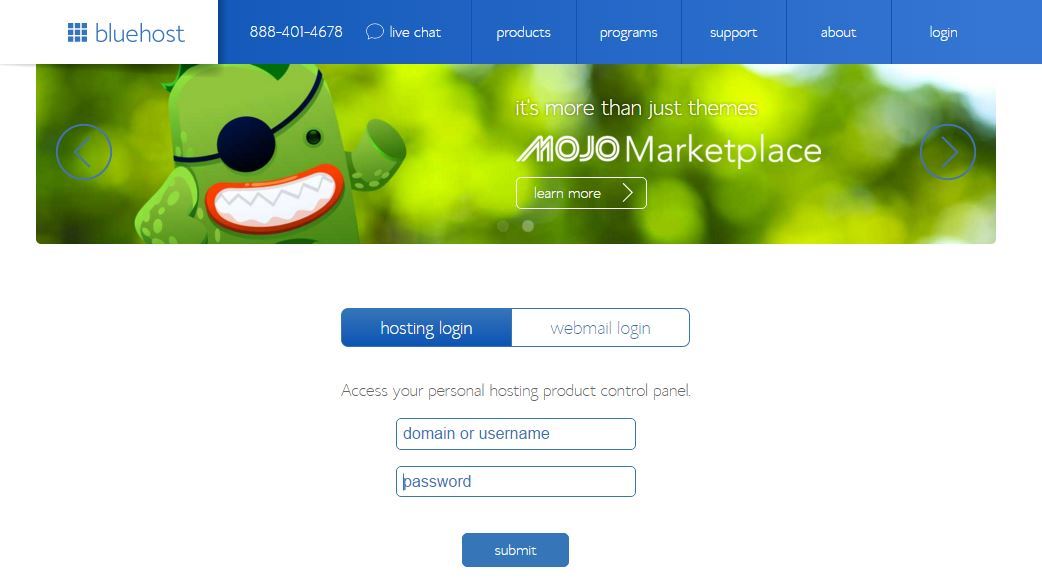
Click on the hosting tab then continue by filling out your domain name (the name that is assigned to the account) and password. All of these details will be in the email BlueHost sent you.
If all went well in the last stage, you should be in and ready to create an awesome blog!
Below is a screenshot of the BlueHost control panel. Here you can install WordPress on your domain, using a really easy 1 click install solution.

Head over to the “Website” section and click on “Install WordPress” to quickly set up WordPress on your domain.
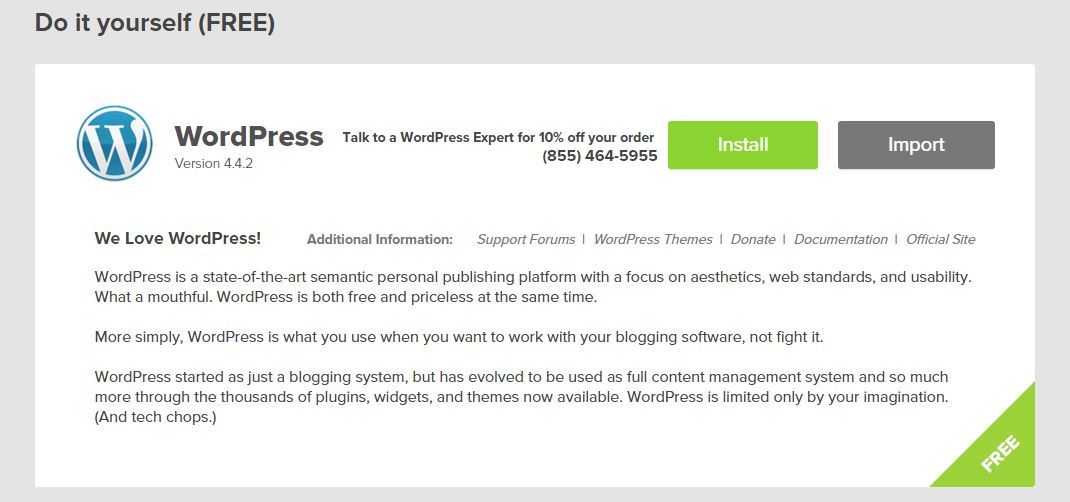
You will then be taken to the Mojo Marketplace and shown a WordPress install page with a big green “Install” button. Click on it to start the magic!
9. The next stage is to select the domain name that you want to install WordPress on. Click on the little arrow in the domain name field and select the domain name you just bought with BlueHost hosting or the one you already owned. It should be visible in the drop down.

9 times out of 10 I will always install WordPress to the root domain, rather than creating the install within a folder of the domain (directory).
Leave the directory window empty. Then click on “Check Domain”.
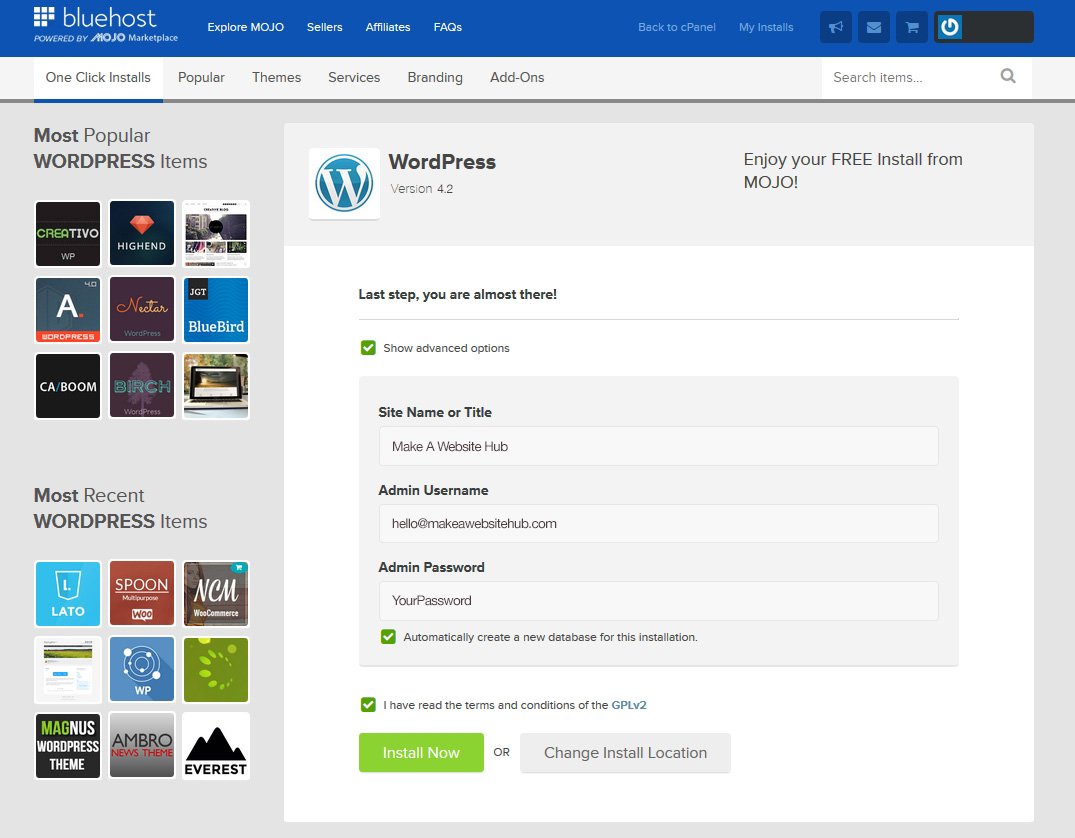
Then just underneath this section, you’ll see a check box which will allow you to see some more advanced options.
Here you can input the title of your site (as you can see, mine is Make A Website Hub), your username (do not use “admin” as this makes it easier for hackers to hack your site), and password (make your password nice and complicated with lots of upper and lower case letters and numbers, minimum of 13 characters long).
Remember that you can change these details later, except for the username.
Make a note of your username and password, maybe in a word doc on your computer or written down and stored in a safe place. Never click “Remember password” within your browser, as this can also make your site vulnerable to attackers.
When you’ve completed all the fields in this section, just check the box to agree to the terms and then click “Install Now”
WordPress is then automatically installed on your domain in a matter of seconds. You’ll get an email from Mojo with all your login login credentials.
Remember, I’m Here To Help You
That’s right! If at any point in this process you have had any problems setting up your blog, you can always contact me for help, totally FREE OF CHARGE!!!
Because I earn a small commission from BlueHost whenever you purchase through my links, I can pass on my services to you for free! Simply sign up to BlueHost, pay for your hosting, then head over to my Free WordPress Install page to claim your free installation set up!
Things just got a whole lot easier, right?
STEP FOUR
Choosing A WordPress Theme
Now that your WordPress blog is built you need to add a WordPress theme that has all of the functions that you need, a WordPress theme is a pre-designed template which you can customize. Right now you have a choice to make you can either go with a free or a paid one. There are of course advantages and disadvantages to both so it comes down to what you want from your blog.
Some of my favourite places to find themes for blogs are:
When you are choosing your theme you want to make sure it fits with your goals. For example, if you are writing a professional blog then you will want a formal clean design where as a music blog you will have more license to show off your creativity.
These days you should now been using a responsive design. This means that the layout of your blog will adapt to different mobile and tablet screen sizes – which is highly important for usability now that a lot of people are using mobile phones to browse the web.
How To Install Your New Blog Theme
Your new theme will come in a .zip file format if you have purchased one. You have the options to upload it straight into your WordPress Dashboard by logging into your WordPress blog.
When you log into your WordPress site for the first time, you will see this view of the dashboard.
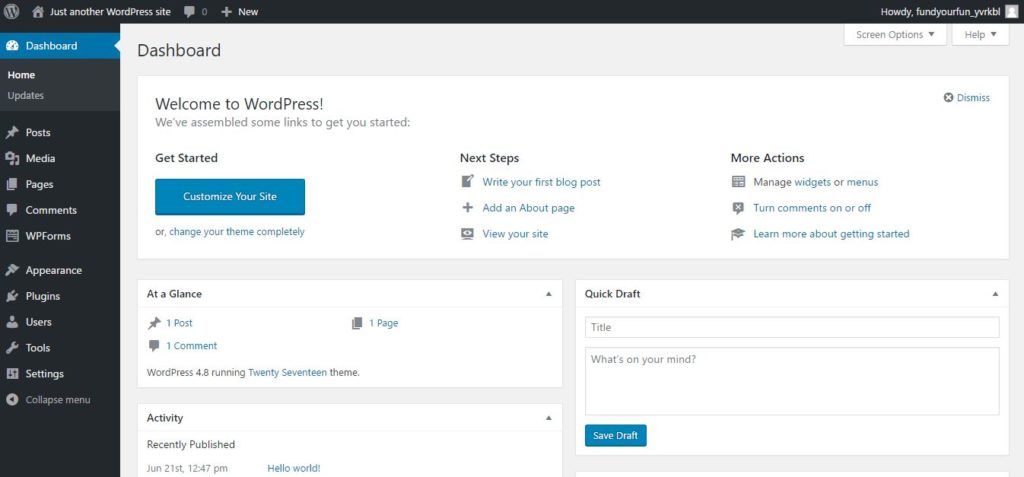
Move the mouse over “Appearance” tab within the dashboard sidebar, and then click on “Themes”. This will open up the Themes page within your WordPress dashboard.

You can then either install one of the free themes that you’ll see available to you on your Themes page dashboard or you can install your own Theme that you may have purchased or downloaded elsewhere.
To install a free theme that’s already on your dashboard pre-loaded, you simply press the Activate button under the theme you want. See below:
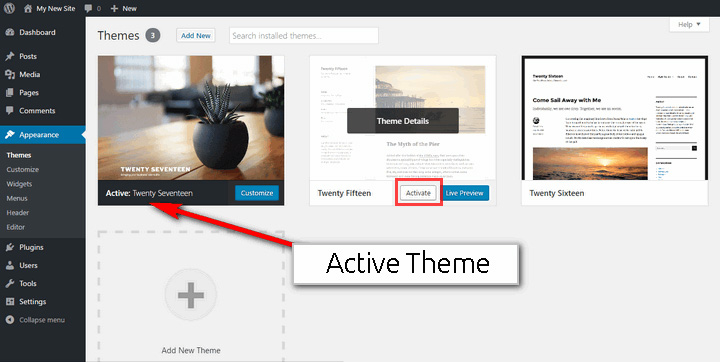
Remember that you can always switch back to your old theme if you don’t like the look of the new one. That’s the beauty of WordPress.
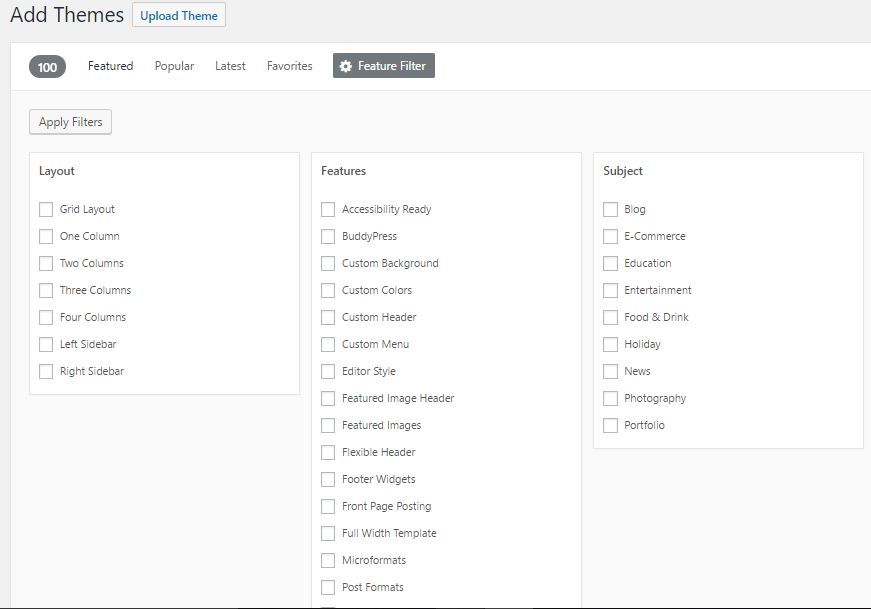
If you don’t want to use any of the themes on your dashboard, click Add New to start looking for a new theme to use. This will bring you to a page where you will be able to search the many thousands of free WordPress themes that are available to download and use on your site.
Here you’ll see four tabs, Featured, Popular, Latest and Favourites. You can also use the search bar to find more themes, as well as being able to customise your search with specific filters, such as searching for themes that are ideal for businesses and that only have 2 columns.
UPLOADING YOUR OWN THEME FROM ZIP FILE
To upload your own theme that you may have purchased from sites like Themeforest or MyThemeshop, you simply do the following…
APPEARANCE >
THEMES >
ADD THEME >
UPLOAD THEMES ( You’ll find this at the top of the page next to “Add Themes” page title.
You then upload your theme .zip file just like you would adding an attachment on to an email.
THEMES >
ADD THEME >
UPLOAD THEMES ( You’ll find this at the top of the page next to “Add Themes” page title.
You then upload your theme .zip file just like you would adding an attachment on to an email.
You’ll now have a pretty blank looking theme set up and waiting for some love. At this stage you want to fill out all the basics like your About page, logos, social media links and other content.
Congratulations you have now taken the first steps to starting your new blog!
FAQ’S ABOUT STARTING A BLOG
1. Is Blogging Still Relevant?
Yes, blogging is still growing – In 2017 blogging is now one of the most popular ways of communicating and spreading information and news online. There are millions of blogs online and everyday you delay in getting started with a blog is another day wasted.
Blogging is a great way to express yourself and share your ideas, creativity and knowledge. Become a thought leader in your niche and leverage that authority for your own gain.
Blogging will help you to connect with other people who share your interests and also become a better writer.
Blogging will help you to connect with other people who share your interests and also become a better writer.
2. How do you make money from a blog?
It’s no big secret- There’s a lot of people out there making a lot of money from blogging. The reason why these people (including myself) are making money from their blogs is because they have never given up, and they have chosen their niche wisely. Blog about what you know, and what you are passionate about to start with. At the same time, have an idea in mind to monetize the blog (advertisements, affiliate offers, products, ebooks etc). If you put the work in, you will get your rewards.
If you want to learn more then read my guide to on how to make money with blogging
3. How long does Blogging Take?
Around 20 minutes – if you already have some ideas about what type of blog you want to start, then this tutorial can be completed quite easily within 20 minutes
As for regularly writing new blog posts and promoting them then it will take much longer. I regularly write one to two blog posts per week for this blog and it takes me about 3 hours per blog post. This includes writing, editing, adding images and promoting the blog posts to my social media followers and email list.
4. Can I start a blog for free?
Yes – there are lots of free blog platforms out there, Blogger.com is the most popular free blogging platform out there. I would not recommend setting up a free blog if you plan to use it professionally for business or to make money from in the future. You also will not have custom domain name either.
Summary
Article Name
How to Start a Blog in 2017
Description
Learn how to start a blog using this step-by-step guide. The process is easy and fast. We also include pictures of the steps to create a blog.
Author
Jamie Spencer
Publisher Name
makeawebsitehub.com
Publisher Logo
Post a Comment